-
If you currently have content for Lexmark products from a different content provider, double content from both 1WorldSync and the other provider may appear. To avoid this you can disable the other content on your site for all categories of Lexmark products, or you can contact the other provider and request that they disable all Lexmark content for you.
-
Depending on how you have integrated the 1WorldSync scripts on your product pages, you may receive Lexmark rich content to your site automatically. If you do not see content for Lexmark, contact our Support Team.
-
Content delivered via our JavaScript can be indexed by Google will not have negative affects search engine ranking. Your SEO or ranking may vary depending on multiple factors not related to our service.
-
1WorldSync Content Solutions’ at Customer Support team with any additional questions.
-
This program is fully funded and free to authorized retailers.
-
Once the code is set, no maintenance is needed.
-
Support is available with technical resources at the portal help center.
Lexmark has chosen 1WorldSync Content Solutions as its exclusive partner to provide Lexmark inline product content and Lexmark Brand Showcase to its retailer partners. To make sure you receive the most up-to-date and complete Lexmark content directly on your website, visit our client portal by creating an account or logging in below.
If you have questions, please contact us.
Help educate your customers on your partnership with Lexmark, enabling them to make an easy selection of the products and solutions you sell.
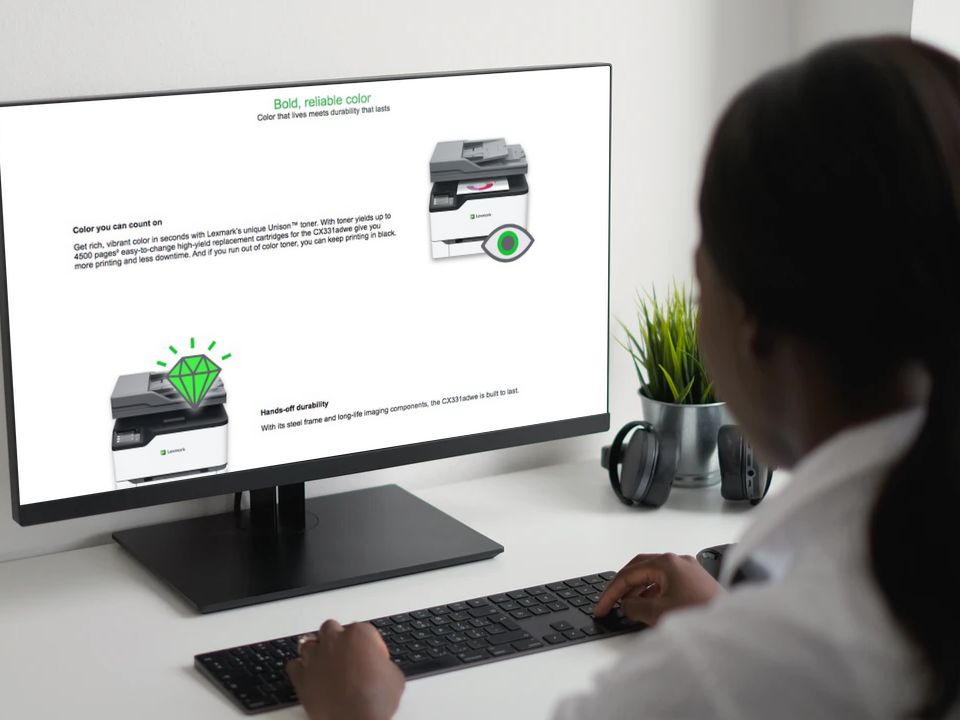
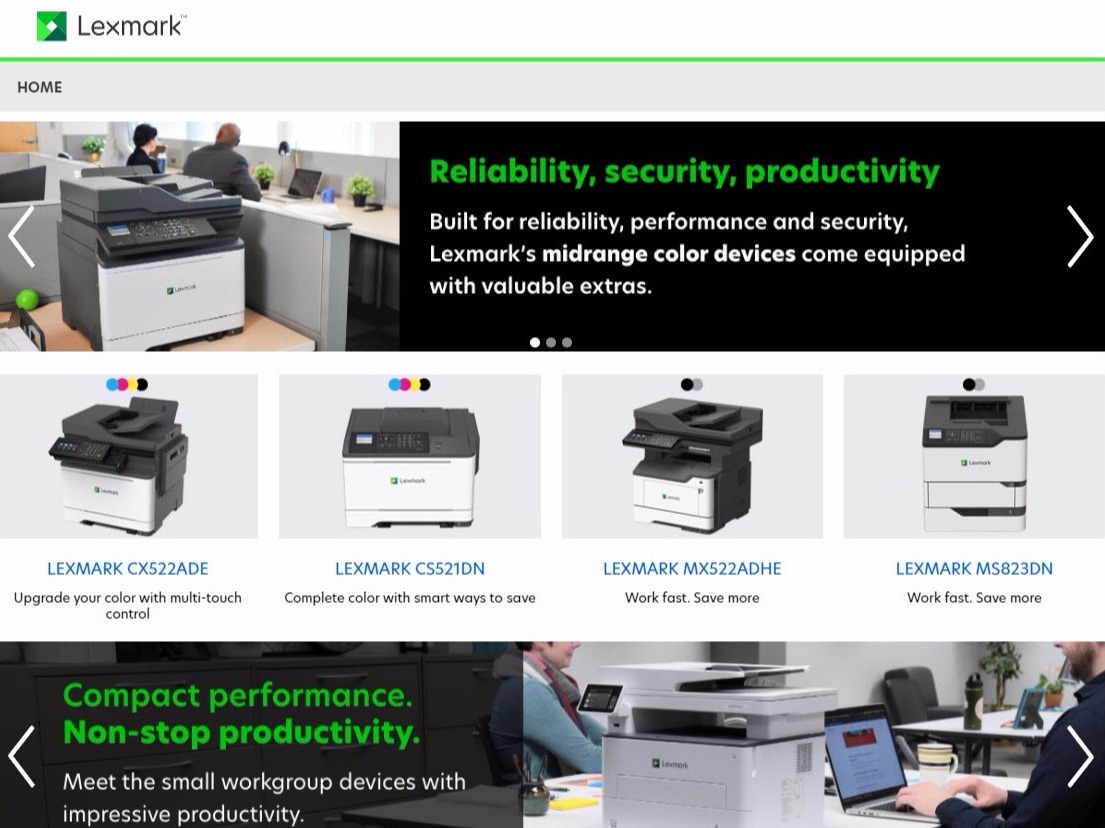
The Lexmark Showcase enables you to display the full assortment of Lexmark products directly on your website. This content is great for a dedicated brand page or where you’d like to highlight Lexmark products and solutions.
Once you set up the code, no updates are required.
Create an account at https://portal.cs.1worldsync.com. You will be asked to verify your email and fill out a profile and company information page.
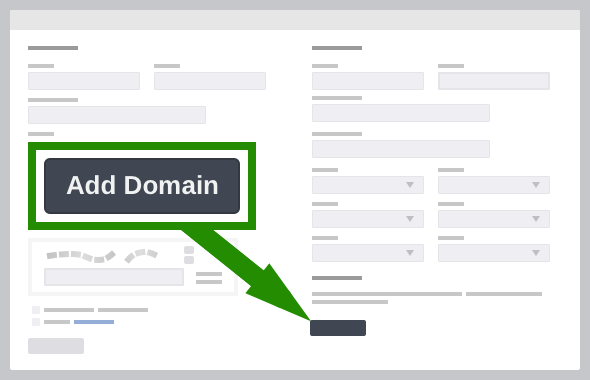
Important Step: Add Domains
The ContentCast system has built-in security that will deliver content to registered sites only.
During the registration, you may add your sites by clicking the Add Domain button. You should add
all root domains/URLs that your site uses (i.e. When
adding the domain for http://www.mysite.com, you only need to add in “mysite.com.”) You may revisit this screen at any time by selecting, while
logged in, Admin > Advanced Settings, then clicking on
Site
Integration Tab > Edit.
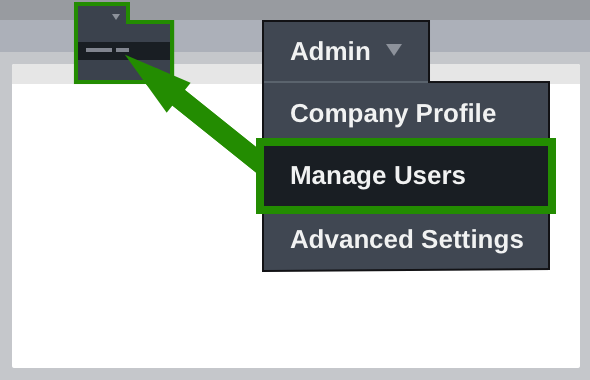
In this section, you can add the users who will be involved with technical implementations on your site. Added users will receive an email invitation to begin the simple process of adding the 1WorldSync ContentCast script to your site. From the main page, select Admin> Manager Users. From the following page, click Add Users, and enter the email address of the person you wish to add. Repeat for any team members you wish to add.
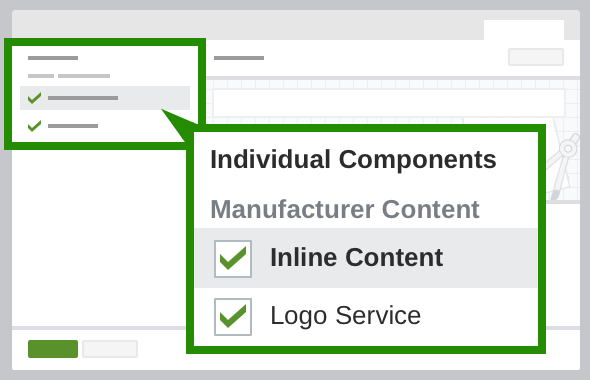
Press the Configure Product Page button on the home page. You will be asked to name your script. (Hint: use an intuitive name.) You may change this setting later. After you have named and saved your script, you will be taken to the main settings page. To receive Inline Content, click the Inline Content check box. The default settings should work for most sites. To start receiving content, press Publish and then Get Code at the bottom of the page.
Important Step: Press Publish
Any time you make changes to the code you must press Publish.
The code provided is a complete sample HTML page. You can copy and paste the entire block of code
into a text editor and save it to your local computer with an
.html
extension.

Below, are the variables that need updating as well as container ids for assigning content areas in your page.
| Replace | variables | with | your values |
|---|---|---|---|
| Change Manufacturer to Lexmark |
MANUFACTURER_NAME
|
→ |
Lexmark
|
| Change Part Number to CX330DEMO |
MANUFACTURER_PART_NUMBER
|
→ |
CX330DEMO
|
| Change Language to EN-US |
LANGUAGE
|
→ |
EN-US
|
| Change Market to US |
MARKET
|
→ |
US
|
| Add content to template | with | your container ids |
|---|---|---|
| The showcase container <div> belongs in the main area of your page |
→ |
<div id='ccs-brand-showcase'></div>
|
| Place the rich inline content container above or in your product details area |
→ |
<div id='ccs-inline-content'></div>
|
    <script type='text/javascript'>
      var ccs_cc_args = ccs_cc_args || [];

      // UPDATE VARIABLES
      ccs_cc_args.push(['mf', 'MANUFACTURER_NAME']);
      ccs_cc_args.push(['pn', 'MANUFACTURER_PART_NUMBER']);
      ccs_cc_args.push(['lang', 'LANGUAGE']);
      ccs_cc_args.push(['market', 'MARKET']);

      (function () {
        var o = ccs_cc_args; o.push(['_skey', 'XXXXXXXX']); o.push(['_zoneid', 'XXXXXXXXXX']);
        var sc = document.createelement('script'); sc.type = 'text/javascript'; sc.async = true;
        sc.src = ('https:' == document.location.protocol ? 'https://' : 'http://') + 'cdn.cs.1worldsync.com/jsc/h1ws.js';
        var n = document.getelementsbytagname('script')[0]; n.parentnode.insertbefore(sc, n);
      })();
    </script>
    <!-- ADD CONTENT -->
    <div id='ccs-brand-showcase'></div>
    <!-- Put along with product details -->
    <div id='ccs-inline-content'></div>